Have you decided to learn Microsoft .NET? Then you are at the right place. Today, in this article, we will see the step-by-step process of how to install the latest .NET SDK which you can use to develop various types of applications on the .NET platform.
If you are looking to work on .NET using Visual Studio, you can check this article - Install Visual Studio 2022 on Windows.
What is .NET
.NET is a free, cross-platform, and open-source software development platform for developers to build many different types of applications supporting various platforms and operating systems.
Using .NET, we can develop applications like Web Applications, Web APIs, Console applications, Desktop applications, cloud-native applications, serverless functions, microservers, games, mobile apps, and many more.
You can read more about .NET on the official Microsoft Documentation.
What is .NET SDK
.NET SDK is the set of libraries and tools that allows developers to build various types of applications and libraries. It contains the components that can be used to build and run the application. These components are the .NET Runtime, .NET Libraries, and .NET CLI.
Installation Steps
Now that we have seen an overview of .NET, let’s see the step-by-step process of installing .NET SDK on the windows operating system.
Step 1 – Download .NET SDK Installer
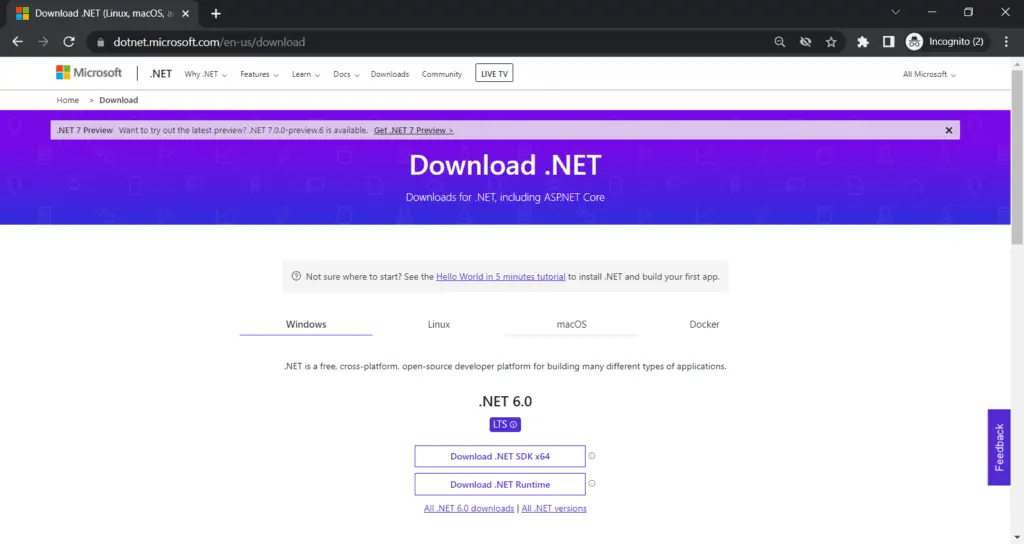
Click Here to download the official installer of the .NET SDK. You should see the below page, click on the button “Download .NET SDK x64”.

Step 2 – Complete the Installation
Once the .NET SDK installer is downloaded, run the installer.

Now click on the Install button. If it shows you a message asking to allow you to do the changes, click yes and the installation should start. Once the installation is complete, you should see the below screen.

Step 3 – Verify Installation
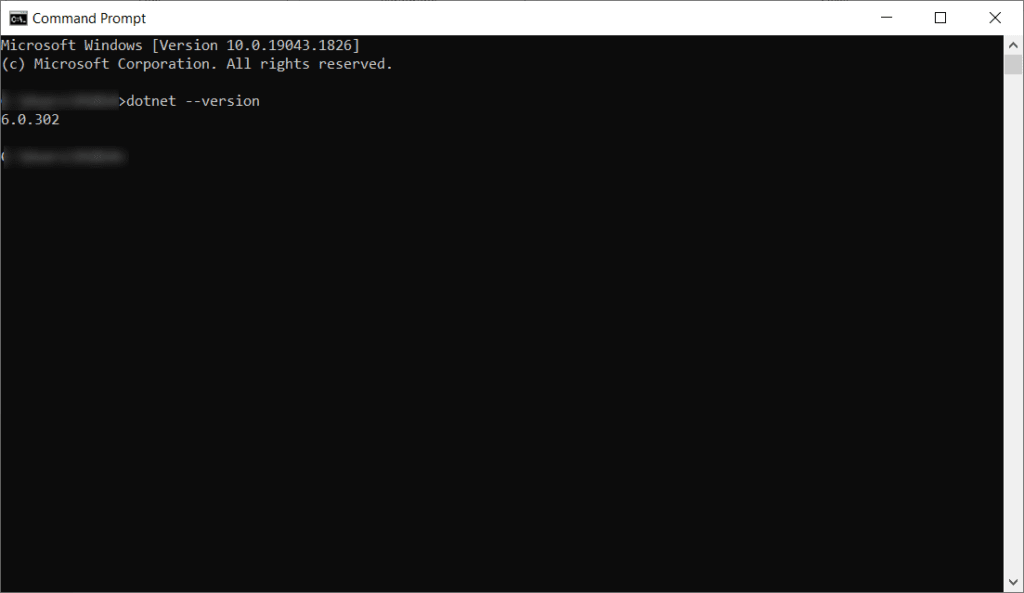
Now let’s verify if the installation was successful. To do this open the command prompt and type the below command.
dotnet --version
And you should see the output showing the version of the .NET SDK as shown below.

In case, you get the error that says “'dotnet is not recognized as an internal or external command, operable program or batch file.”, then make sure the installation is done correctly. Also, make sure the dotnet installation path (default path is C:\Program Files\dotnet) is added to the System Environment variable “PATH”.

Once this is added, you can restart the command prompt and try the above command again and it should work.
And that’s it, the installation is complete. It’s that easy. Now you are ready to start building the apps with Microsoft.NET.
Conclusion
In this blog, we took a quick overview and installation steps of the .NET SDK.
If you are looking for more such installation guides, don’t forget to check out the below blogs.
Thank you for taking the time to read this blog post. We hope that you found the information provided in the blog to be helpful and informative. For similar content, please check out our other blogs.
We appreciate your support and feedback, and we would love to hear from you if you have any questions or comments about the blog. If you have any specific topic you want us to cover in the future, please feel free to let us know.
Once again, thank you for reading our blog, and we look forward to your continued support.
