
In this article, we will look at the step-by-step process to install Visual Studio 2022 on the windows operating system.
If you are looking to work on .NET without using Visual Studio and use VS Code with .NET SDK instead, you can check this article - Install .NET SDK on Windows.
Step 1 – Download Visual Studio 2022.
Visit the official visual studio download website - https://visualstudio.microsoft.com/downloads/. You should see the below screen.
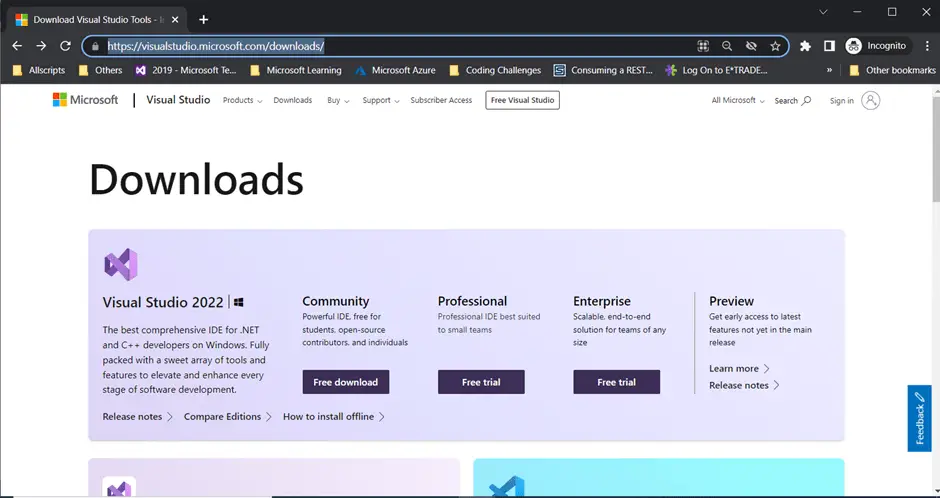
Select the appropriate version of visual studio and click on the download button below it. Once you click it, it should download the Visual Studio installer on your machine. Once it’s downloaded, make sure the visual studio is closed, and then run the installer.
Step 2 – Install Visual Studio 2022.
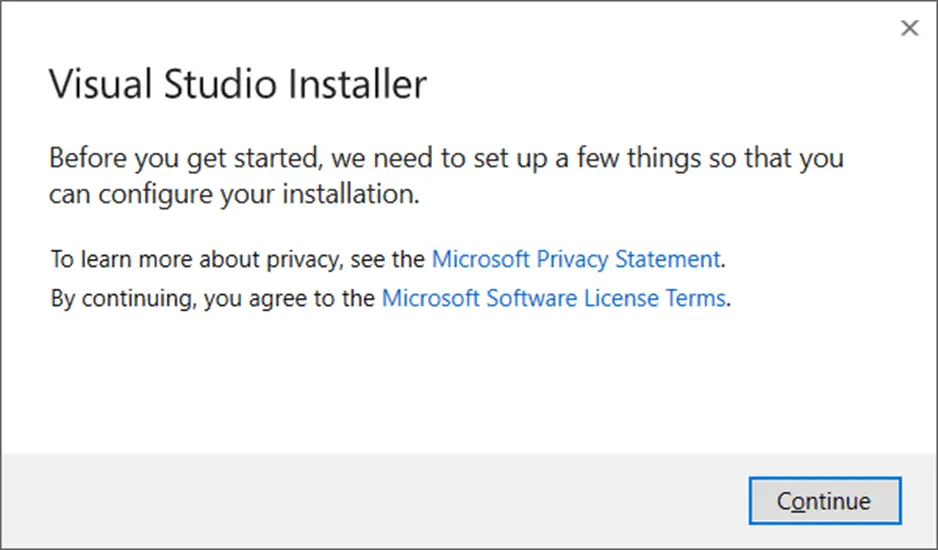
Once you run the installer, you should see the below screen. Now, click on the Continue button.
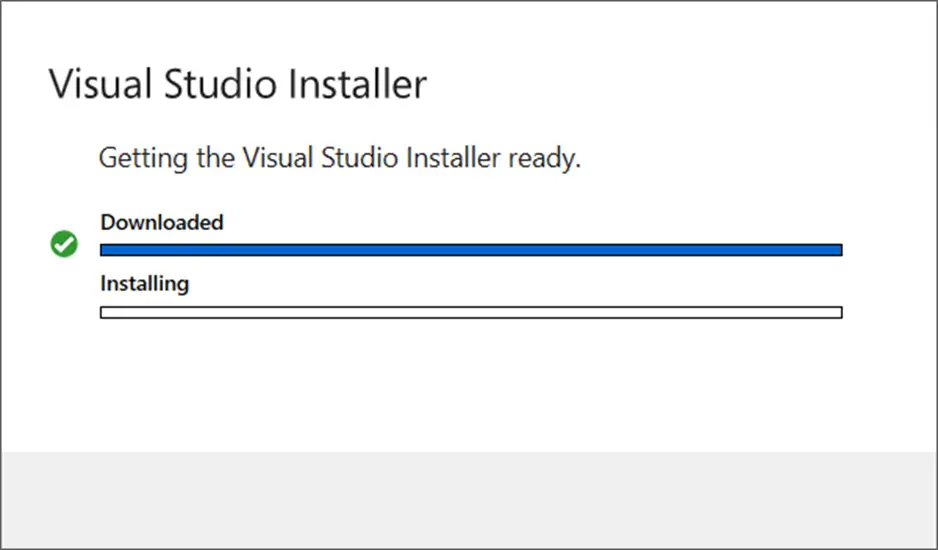
Once you click continue, it will start downloading some files and installing the visual studio installer on the machine. The Visual Studio installer is itself a piece of software that gets installed on your machine before the actual visual studio is installed. This installer software is used to Add/Remove components of the visual studio in the future as well.
Once the installer is installed, you will see the below screen.
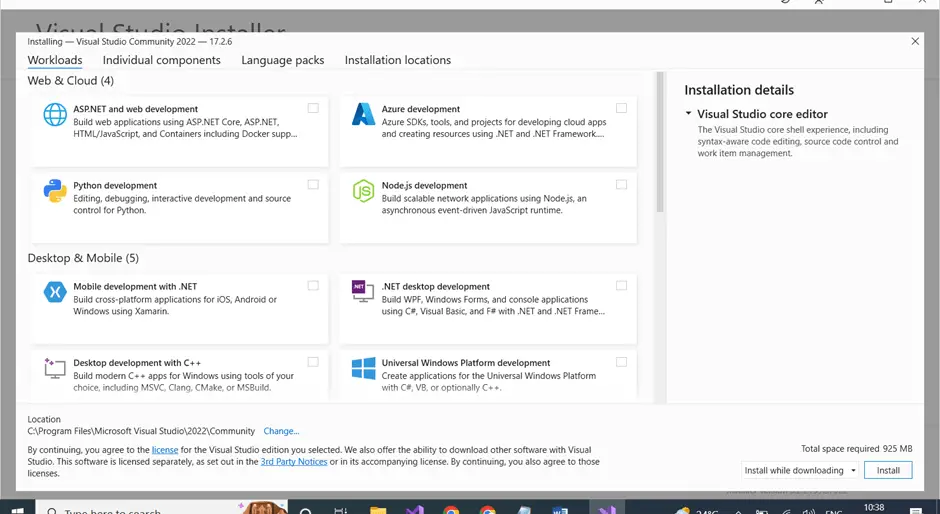
Select the appropriate workloads, Individual components that need to be installed for the visual studio, and select Install.
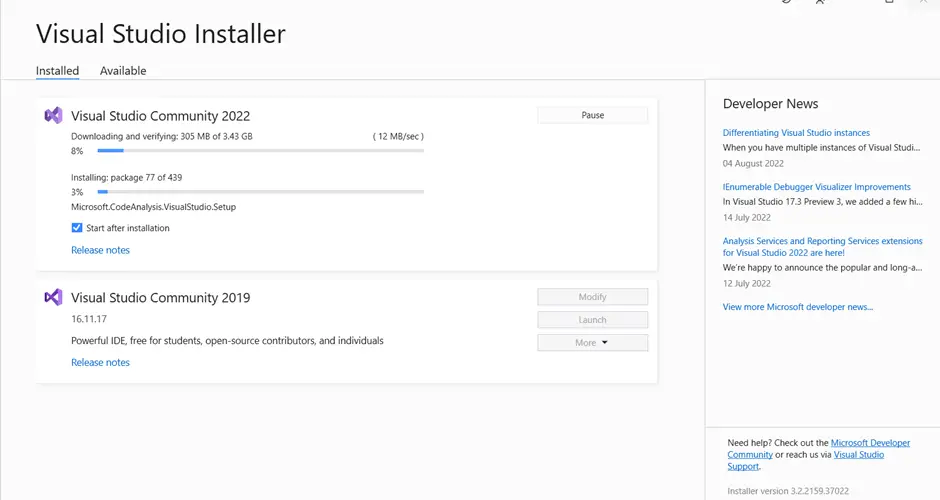
Once you click install, the visual studio installer, will start downloading the files from the internet for the selected components and perform the installation as shown below. This process can take some time.
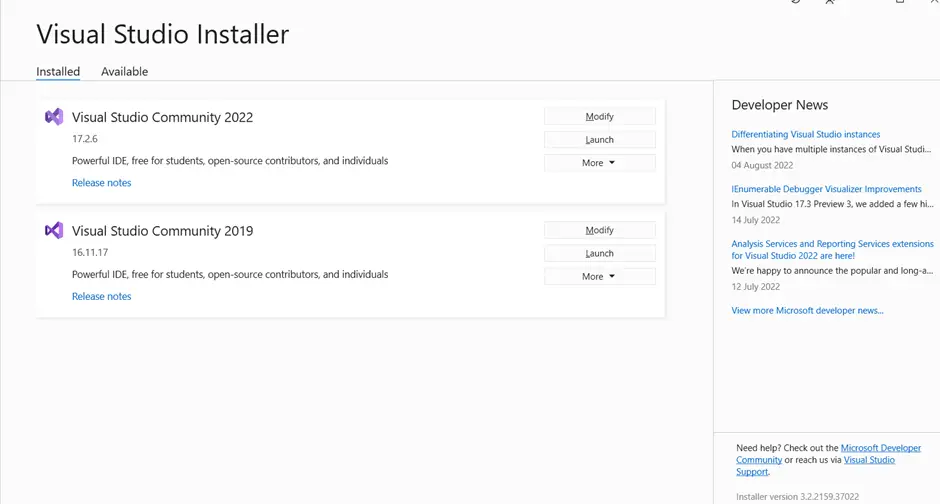
Once the installation is done, the below window will be shown.
Step 3 - Verify Installation
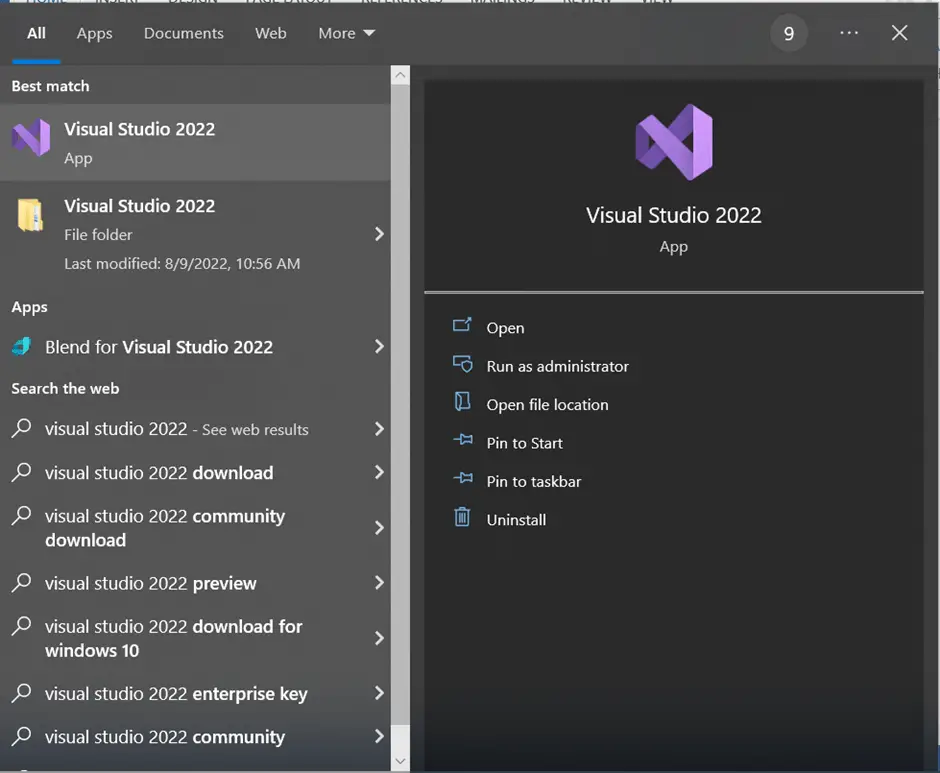
To verify the installation is successful, type Visual studio 2022 in the Start menu, and you should see the icon with Visual Studio 2022 as shown below.
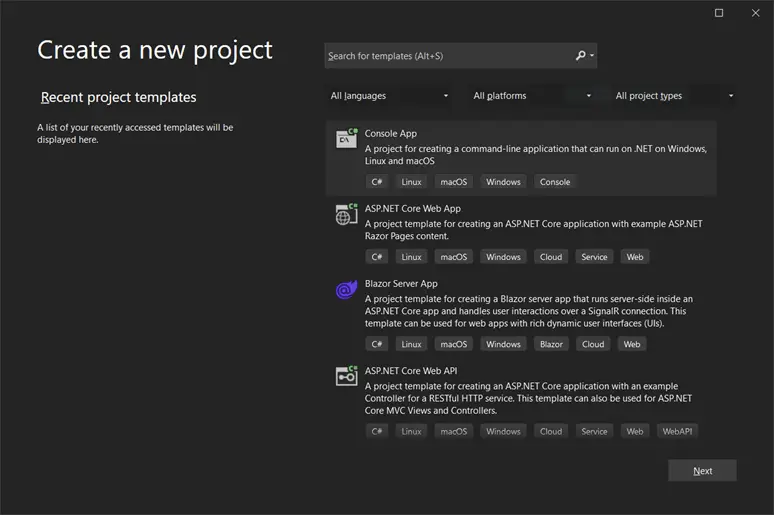
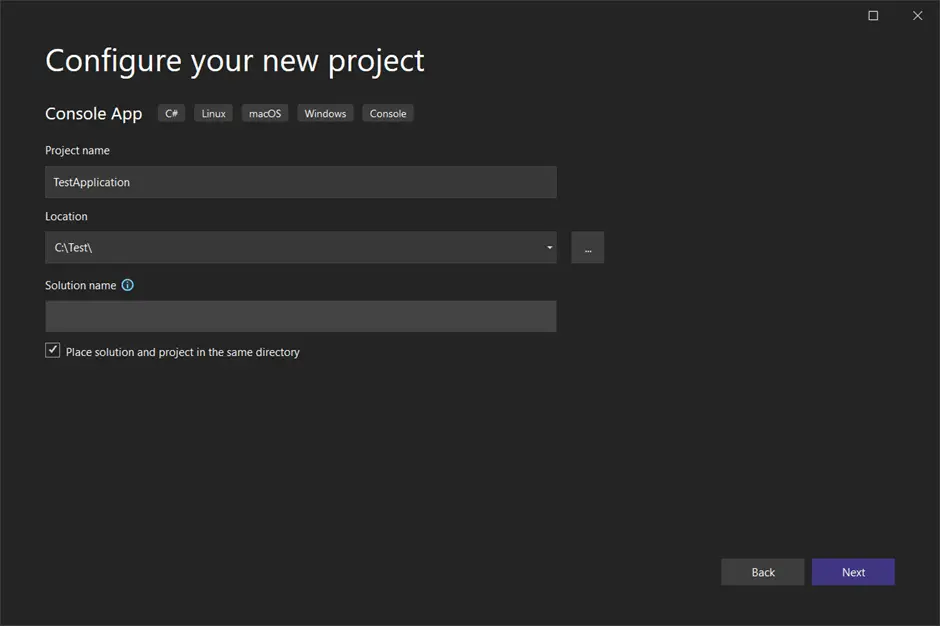
Now open VS 2022, and create a new console application. To do this, click on File -> New project. In the Create a new project wizard, Select Console App and click on Next.
Let’s give the application name, TestApplication, and click Next.
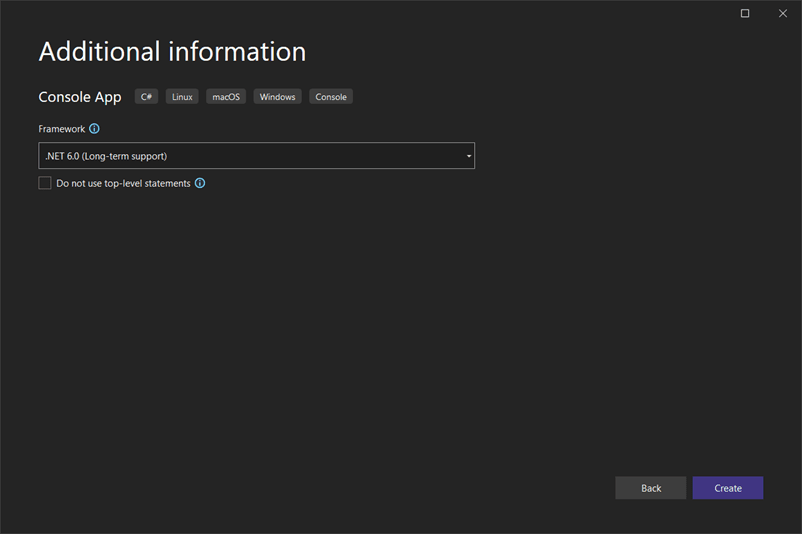
Select the framework that we want to work with. In this case, let’s go with the latest .NET 6.0 and then click on Create.
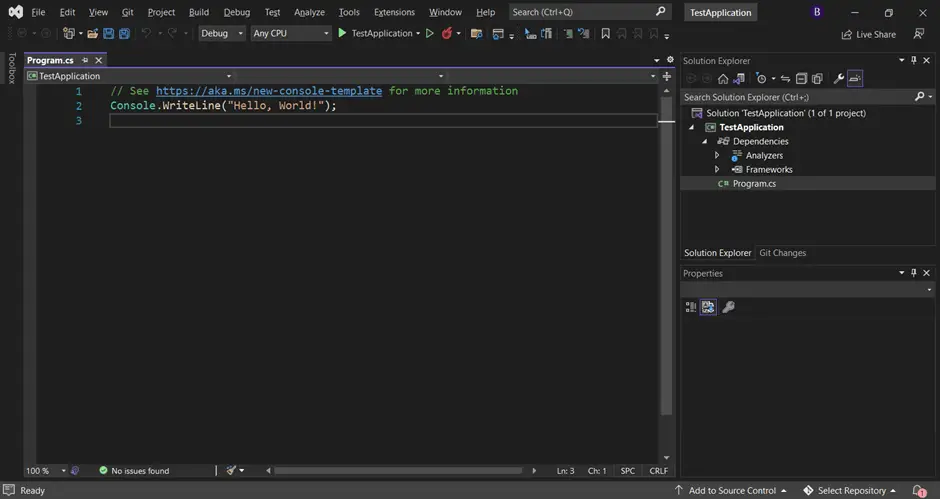
Once you click Create, the VS 2022, will create the default Hello World console app for us as shown below.
Let’s run it.
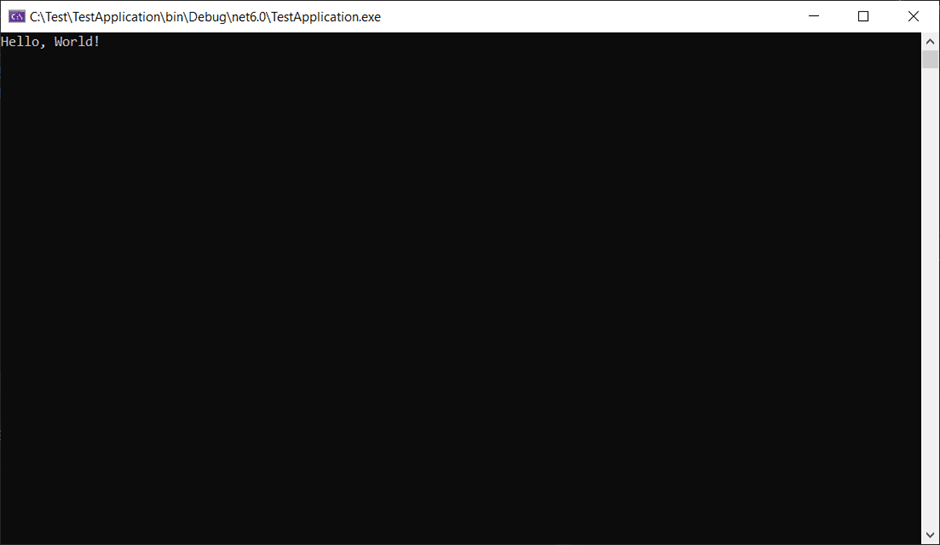
And that's it, as you can see above the application ran successfully. So our installation is complete and successful.
I hope this article was helpful to all of you. Thanks for your time.